Openoffice writer
Содержание:
- Initiation
- About ports and distributions
- Extension Development
- Notes on Installation
- Product Development
- Documentation
- Licenses of Legacy Releases of OpenOffice.org software
- Поддерживаемые форматы файлов
- Защита паролем
- Apache OpenOffice ReadMe
- Меню
- ODF Support
- Сохранение документа в формате MS Word
- Получение помощи
- Enhancements to statistical functions
- Возможности OpenOffice
- Окна, панели, меню и настройки
- Долго появляется контекстное меню по клику правой кнопки мыши (30 сек. и более)
- В предварительном просмотре страницы две кнопки для печати. В чём разница?
- Названия закладок на русском языке в Навигаторе отображаются некорректно.
- Невозможно закрепить панели инструментов, чтобы не исчезали (в меню эти пункты не активны)!
- Куда делись дополнительные поля пользователя из свойств документа?
- Создание документа на основе шаблона
- Открытие существующего документа
- Сохранение документа
Initiation
|
Titre |
Description |
Formats |
|
Découvrir OpenOffice |
Le traitement de texte de la suite |
PDF ODT |
|
Apache OpenOffice pour étudiants |
Apache OpenOffice Writer pour l’uni (David Paenson, B. A. Hons, 2013) |
PDF ODT |
|
Découvrir OpenOffice – L’environnement et les commandes de base |
Ce tutoriel vous fait découvrir l’interface d’OpenOffice, ses commandes de |
PDF ODT |
|
B.A.-BA au Traitement de texte Writer |
Comme son nom l’indique, il s’agit d’une toute première partie initiatique. |
|
|
Les caractères |
Précédé du B.A.-BA qui est une introduction à l’utilisation du logiciel de traitement de texte de la suite bureautique d’OpenOffice.org, ce tutoriel traite des Caractères et des différents attributs qui peuvent leurs être affectés. Contrairement à certains traitements de texte, il est possible de créer des Styles de caractères spécifiques qui s’appliquent uniquement à un ou plusieurs caractères et sont gérés à part entière et sont donc différents des Styles de paragraphes. |
|
|
Les paragraphes |
Troisième volet de l’initiation, après le B.à.-BA, les Caractères, voici les Paragraphes. |
PDF ZIP |
|
Les tableaux |
Quatrième volet de l’initiation au traitement de texte, voici un gros dossier sur les tableaux. Il débute par la réalisation d’une En-tête de lettre, en initiation à l’utilisation d’un tableau aux bordures invisibles. Puis il détaille les différents attributs en s’appuyant sur les outils mis à disposition (barre d’outils «Tableau», dialogue «Format de tableau», options, etc). |
PDF |
|
Les styles de Titre |
Ce tutoriel est la suite logique du tutoriel « Tout sur les paragraphes » puisqu’il traite de l’utilisation de la création des Styles de paragraphe. Il traite directement des Styles de titre qui font partie des Styles de paragraphes.pour éviter des redites inutiles. Les Styles de titre s’en distinguent seulement par leur utilisation pour différentier les différents Chapitres qui forment le Plan dans un document. La numérotation automatique des chapitres qui se sert des Styles de titre est une particularité de Writer. En les utilisant avec la numérotation automatique des chapitres pour chaque Niveau du Plan, cela permet la création des Tables de matières ou Index. |
PDF |
|
Les styles de Page |
Les styles de Page sont une caractéristique incontournable de Writer qui le distingue des autres Traitements de texte. Ils sont indispensables pour bien paginer et numéroter automatiquement les différentes pages d’un document important. Savoir utiliser les Styles de Page, c’est profiter pleinement de l’esprit de création de Writer. Au lieu d’utiliser les Sections qui fonctionnent d’ailleurs très bien mais pour d’autres utilisations avec Writer, le recours aux Styles de Page permet de se créer un ensemble d’outils qui faciliteront la gestion de travaux multiples d’édition. |
PDF |
About ports and distributions
Apache OpenOffice (AOO) is a productivity suite which is already
officially available for the following platforms:
- Windows — XP, Vista, 7, 8, 10 (32-bit)
- Linux — RPM / DEB-based (32-bit and 64-bit)
- MacOS X (Intel) — 10.4 (Tiger) up to 10.15 (Catalina)
What is a port?
When making AOO available for another operating system or CPU architecture, then this is called «porting or a port».
Usually this is done on the source code level.
More general information here.
What is a distribution?
When taking an already available AOO installation and package it in a different way to make it ready to run directly,
e.g., from a USB stick resp. CD/DVD or on another Linux OS, then this is called «distribution or distro».
More general information here.
Extension Development
| Project | Short Name | Description |
|---|---|---|
| Extensions | extensions | The purpose of this project is to help produce, organize and deploy extensions. An extension is a third party tool that brings OOo new functionality. This can be done through addons, addins, deployed by UNO packages. Extensions also covers templates and galleries. |
| External | external | This project will host all the external code allowed. |
| Universal Content Broker | ucb | Allows the applications to transparently access content with different structures. |
| Bibliographic Project | bibliographic | To provide integrated bibliographic functionality in OpenOffice.org. |
Notes on Installation
Problems During Program Startup
If you encounter any startup problems not covered in your system specific README file, please
subscribe to our users mailing list, or Community Forums
for further assistance.
Shortcut Keys
Only shortcut keys (key combinations) not used your installed operating system can be used in OpenOffice. If a key combination in OpenOffice does not
work as described in the OpenOffice Help, check if that shortcut is already used by the operating system. To resolve such conflicts, you can change the
keys assigned by your operating system. Alternatively, you can change almost any key assignment in OpenOffice. For more information on this topic,
refer to the OpenOffice Help or the Help documentation of your operating system.
Due to a conflict with input method switching on multiple platforms, the following shortcut keys have been changed:
- — is now —
- — is now —
File Locking — Linux, Mac, Solaris
In the default setting, file locking is turned on in OpenOffice. To deactivate it, you have to set the appropriate environment variables
SAL_ENABLE_FILE_LOCKING=0 and export SAL_ENABLE_FILE_LOCKING. These entries are already in enabled form in the soffice script file.
Warning: The activated file locking feature can cause problems with Solaris 2.5.1 and 2.7 used in conjunction with Linux NFS 2.0. If your system
environment has these parameters, we strongly recommend that you avoid using the file locking feature. Otherwise, OpenOffice.org will hang when you try to
open a file from a NFS mounted directory from a Linux computer.
Product Development
| Project | Short Name | Description | |
|---|---|---|---|
| Security | security | To improve security and privacy features in OpenOffice.org | |
| Performance | performance | To improve the performance of OpenOffice.org | |
| Word Processing | sw | The word processing application Writer the formula editor Math. | |
| Spreadsheet | sc | The spreadsheet application Calc. | |
| Graphic Applications | graphics | The Graphic applications like Impress, Draw and Chart. | |
| Graphic System Layer | gsl | The Graphic System Layer (GSL) project is an umbrella project to provide graphic output on different devices. Graphic output refers to a range of operations starting from simple line drawing to complex raster operations. | |
| Base / Database Access | dba | Base is OpenOffice.org’s database application. Additionally, this project provides the other applications with access to a variety of relational data sources in various formats. | |
| API | api | The application programming interface. | |
| Application Framework | framework | This project contains modules that define the general behaviour of the OpenOffice application components ( Writer, Calc etc. ) | |
| Build Tools and Environment | tools | The tools used in the build process and the build environment. | |
| Quality Assurance | qa | Quality Assurance: testing and qualifying all builds of OpenOffice.org. | |
| UNO Development Kit / Component Technology | udk | Object model development and component technology. Includes the old OI and Scripting projects. | |
| User Experience | ux |
The main goal of the User Experience Team is to make OpenOffice.org the best office suite in terms of usability, productivity and enjoyment. |
|
| User Interface | ui | Common user interface for OpenOffice.org applications. | |
| XML Project | xml | The OpenOffice.org XML project is the home of of XML related features of OpenOffice.org, like its OASIS OpenDocument/ISO/IEC 26300 file format implementation. It further provides some XML base implementations, like XML parser and printer components. |
Documentation
User Documentation provided by the Documentation Project
- Writer Guide
- Writer FAQ
- Math FAQ
- Writer How Tos
- Tutorials
If you have some questions that can’t be answered by these documents please send them to our users@openoffice.apache.org mailing list. If you prefer to discuss your questions in your own language please go to the home page of the Apache OpenOffice Native Language project that matches your language. The home page of the selected language project should guide you to its users mailing list.
Internal Documentation
- OOoWriterDesignProblems
- SwNodesBNF
- Writer/BiDi Layout
- Writer/CJK Justification
- Writer/Code Conventions
- Writer/Core And Layout
- Writer/Debugging
- Writer/Linguistic
- Writer/Text Formatting
- Writer/Vertical Layout
- Writer/WYSIWYG
- Writer/page styles
- Writer/views
API Documentation
- API/Samples/Groovy/Writer/CleanUpForHTML
- API/Samples/Groovy/Writer/MostPopularWords
- API/Samples/Java/Writer/BookmarkInsertion
- API/Samples/Java/Writer/GraphicsInserter
- API/Samples/Java/Writer/HardFormatting
- API/Samples/Java/Writer/TextDocumentStructure
- API/Samples/Java/Writer/TextReplace
- API/Samples/Java/Writer/TextTable
- Grammar Checking API
- Translating Java Code in cpp
- Writer/API/Overview
- Writer/API/Tables
- Writer/API/TextRange
- Writer/API/Text cursor
- Writer/API/View cursor
- Writer/Smart Tags
Licenses of Legacy Releases of OpenOffice.org software
Apache Releases follow specific policies concerning licensing that are closely tied to the branding of the product. It
still may be possible, however, to find older releases through third parties or Internet archives that lie out of the
control of the Apache Project. For this reason it is highly recommended to review carefully the documentation included with
the software.
For past releases under the SUN/Oracle umbrella, OpenOffice.org used a single open-source license for the source code and
a separate documentation license for most documents published on the website without the intention of being included in the
product. The source-code license was the GNU Lesser General Public License. Effective OpenOffice.org 3.0 Beta,
OpenOffice.org used the LGPL v3. The document license was the Public
Document License (PDL).
Works beside code donated to the project under cover of the Oracle Contributor Agreement (OCA) were held jointly by
Oracle for the project under the project’s prevailing license, in this case, the LGPL v.3. Even if you had already submitted
a copyright agreement (e.g., the SCA or its predecessors), you could also sign the PDL per work contributed, in which case
the PDL took precedence. In some cases, the use of the Creative Commons Attribution License (
«Attribution-NoDerivs 2.5») was also permitted. See
for details on the circumstances of using this license.
-
Public Document License (PDL)
PDF |
HTML |
RTF (text) -
GNU Lesser General Public License v3 (LGPL) (Effective with OpenOffice.org 3.0 Beta)
You can freely modify, extend, and improve the OpenOffice.org source code. The LGPL requires that all changes must be
made available if published. For more information on the LGPL, please also visit the:
Free Software Foundation’s FAQ.
Other Works
The preference was always for contributions of editable work. But in those cases where editable material was difficult to
obtain, there were several options; all presumed that the developer held copyright in the work:
- Developers would have signed a Contributor Agreement, which covers all work (and not just code) contributed to
OpenOffice.org; - In countries where laws allow it, the developer could make it public domain by declaring as much in a signed document;
or - developers could use the Creative Commons Attribution License (
«Attribution-NoDerivs 2.5»). SUN/Oracle only
accepted work under this license that was non-editable and for which there was no editable version that could be
contributed to the project.
Поддерживаемые форматы файлов
OpenOffice использует ISO/IEC 26300:2006OpenDocument как родной формат. OpenOffice версий 2.0-2.3.0 по умолчанию использовал ODF 1.0, версий 2.3.1-2.4.3 — ODF 1.1.
До версии 1.x, OpenOffice использовал OpenOffice.org XML. Это помогло OASIS разработать на его основе OpenDocument.
OpenOffice также заявляет о поддержке следующих форматов:
| Формат | Расширение | Чтение | Запись | Примечания |
|---|---|---|---|---|
| OpenOffice.org XML | SXW, STW, SXC, STC, SXI, STI, SXD, STD, SXM | Да | Да | родной до 2.x |
| Microsoft Word для Windows 2 | DOC, DOT | Да | Да | |
| Microsoft Word 6.0/95 | DOC, DOT | Да | Да | |
| Microsoft Word 97-2003 | DOC, DOT | Да | Да | |
| Microsoft Word 2007 | DOCX | Да | ||
| (WordprocessingML) | XML | Да | Да | |
| Microsoft Excel 4/5/95 | XLS, XLW, XLT | Да | Да | |
| Microsoft Excel 97-2003 | XLS, XLW, XLT | Да | Да | |
| DocBook | XML | Да | Да | с версии 1.1 |
| WordPerfect | WPD | Да | ||
| WordPerfect Suite 2000/Office 1.0 | WPS | Да | ||
| StarOffice StarWriter 3/4/5 | SDW, SGL, VOR | Да | Да | |
| Ichitaro 8/9/10/11 | JTD, JTT | Да | ||
| ApportisDoc (Palm) | PDB | Да | Да | Требует Java |
| Hangul WP 97 | HWP | Да | ||
| Microsoft Pocket Word | PSW | Да | Да | Требует Java |
| Microsoft Pocket Excel | PXL | Да | Да | Требует Java |
| Microsoft RTF | RTF | Да | Да | «you are likely to experience loss of formatting and images» |
| Обычный текст | TXT | Да | Да | поддерживаются различные кодировки |
| Portable Document Format | Да | Да | Экспорт из 1.1; PDF/A-1a (ISO 19005-1) экспорт из 2.4; some readable in Impress | |
| Значения, разделённые запятыми | CSV, TXT | Да | Да | |
| Microsoft Excel 2003 XML | XML | Да | Да | |
| Lotus 1-2-3 | WK1, WKS, 123 | Да | ||
| Data Interchange Format | DIF | Да | Да | |
| StarOffice StarCalc 3/4/5 | SDC, VOR | Да | Да | |
| dBase | DBF | Да | Да | |
| SYLK | SLK | Да | Да | |
| HTML | HTML, HTM | Да | Да | |
| Quattro Pro 6.0 | WB2 | Да | ||
| Microsoft PowerPoint 97-2003 | PPT, PPS, POT | Да | Да | |
| StarOffice StarDraw/StarImpress | SDA, SDD, SDP, VOR | Да | Да | |
| Computer Graphics Metafile | CGM | Да | Binary-encoded only; not those using clear-text or character based encoding | |
| StarOffice StarMath | SXM | Да | Да | |
| MathML | MML | Да | ||
| BMP | BMP | Да | Да | |
| JPEG | JPG, JPEG | Да | Да | |
| PCX | PCX | Да | ||
| Adobe PhotoShop | PSD | Да | ||
| SGV | SGV | Да | ||
| Windows Metafile | WMF | Да | Да | |
| AutoCAD DXF | DXF | Да | ||
| MET | MET | Да | Да | |
| Netpbm format | PGM, PBM, PPM | Да | Да | |
| SunOS Raster | RAS | Да | Да | |
| SVM | SVM | Да | Да | |
| X BitMap | XBM | Да | ||
| Enhanced Metafile | EMF | Да | Да | |
| HPGL plotting file | PLT | Да | ||
| SDA | SDA | Да | ||
| Truevision TGA (Targa) | TGA | Да | ||
| X PixMap | XPM | Да | Да | |
| Encapsulated PostScript | EPS | Да | Да | |
| PCD | PCD | Да | ||
| Portable Network Graphic | PNG | Да | Да | |
| SDD | SDD | Да | ||
| Tagged Image File Format | TIF, TIFF | Да | Да | |
| Graphics Interchange Format | GIF | Да | Да | |
| PCT | PCT | Да | Да | |
| SGF | SGF | Да | ||
| Adobe Flash | SWF | Да | Экспорт из Impress | |
| Scalable Vector Graphics | SVG | Да | Экспорт из Draw | |
| Software602 (T602) | 602, TXT | Да | ||
| Unified Office Format | UOF, UOT, UOS, UOP | Да | Да | с версии 3.0 |
Защита паролем
Чтобы защитить документ от несанкционированного просмотра, служит опция установки пароля в диалоговых окнах Сохранить и Сохранить как. Эта опция доступна только для файлов, сохранённых в форматах OpenDocument или в старых форматах OpenOffice.org 1.x.
- В диалоговом окне Сохранить / Сохранить как нужно выбрать опцию Сохранить с паролем и потом щёлкнуть по кнопке Сохранить . После этого будет предложено ввести пароль.
- Необходимо ввести одинаковый пароль в поля Введите пароль и Повторите ввод пароля, а затем щёлкнуть по кнопке OK . Если введённые символы совпадут, то документ будет сохранён под паролем. Если введённые символы не совпадут, то будет предложено повторить ввод пароля.
| Пароли должны состоять минимум из 5 символов. Кнопка OK останется недоступной при меньшем количестве символов. |
Apache OpenOffice ReadMe
Last Update: 2017-12-30
Dear User
This file contains important information about this program. Please read this information very carefully before starting work.
The Apache OpenOffice Community, responsible for the development of this product, would like to invite you to participate as a community member.
As a new user, you can check out the Apache OpenOffice project site at openoffice.apache.org.
Please also read the sections below about getting involved in the Apache OpenOffice project.
Is OpenOffice really free for any user?
OpenOffice is free for use by everybody. You may take this copy of OpenOffice and install it on as many computers as you like,
and use it for any purpose you like (including commercial, government, public administration and educational use).
For further details see the license text delivered together with OpenOffice or https://www.openoffice.org/license.html
Why is OpenOffice free for any user?
You can use this copy of OpenOffice today free of charge because individual contributors and corporate sponsors have designed, developed, tested,
translated, documented, supported, marketed, and helped in many other ways to make OpenOffice what it is today — the world’s leading open-source
office software.
If you appreciate their efforts, and would like to ensure Apache OpenOffice continues into the future,
please consider contributing to the project — see https://openoffice.apache.org/get-involved.html for details on contributing time,
and https://www.apache.org/foundation/contributing.html for details on donations. Everyone has a contribution to make.
Меню
Строка меню расположена в верхней части окна Writer, сразу под строкой заголовка. Если в строке выбрать одно из меню, то раскроется подменю с соответствующими командами.
- Файл содержит команды, применяемые ко всему документу, например: Открыть, Сохранить, Экспорт в PDF.
- Правка содержит команды для редактирования документов, например: Отменить и Найти и заменить.
- Вид содержит команды для управления отображением документа, например: Масштаб и Режим веб-страницы.
- Вставка содержит команды для вставки в документ таких элементов, как верхние или нижние колонтитулы, рисунки.
- Формат содержит команды для форматирования внешнего вида документа, например: Стили, Абзац и Маркеры и нумерация.
- Таблица содержит все команды, необходимые для вставки и редактирования таблиц в текстовом документе.
- Сервис содержит такие функции, как Орфография и грамматика, Настройка и Параметры.
- Окно содержит команды управления окном документа.
- Справка содержит ссылки на файлы помощи, а также информацию о программе. Подробности в разделе .
ODF Support
Open Document Format (ODF) standards, as promulgated by the Organization
for the Advancement of Structured Information Standards (OASIS), set international compatibility
criteria for the electronic/digital storage of documents.
These standards recognize the importance of interoperability and
intelligent information exchange and seek, for example, to ensure that
office documents created today on any given computer system will be
readable by other computer systems everywhere, including the technology of
tomorrow.
OpenOffice.org 3.2 has made further strides in compliance with ODF 1.2,
including closer conformance to OASIS ODFF/OpenFormula specifications.
- As OpenOffice.org 3.2 currently requires a superset of the ODF 1.2
specification, the software now warns users when ODF 1.2 Extended
features have been used. - The document integrity check now proves whether an ODF document
conforms to the ODF specification (this mainly affects ODF 1.2
documents). If an inconsistency is found, the document is treated as a
broken one, and OpenOffice.org offers to repair the document.
Сохранение документа в формате MS Word
Может потребоваться обмениваться документами с другими пользователями, которые используют MS Word, а не Apache OpenOffice. К счастью, Apache OpenOffice умеет открывать и создавать файлы в формате MS Word.
Чтобы сохранить документ в формате MS Word:
- Сначала рекомендуется сохранить документ в формате Apache OpenOffice (*.odt). Если этого не сделать, то все последние изменения документа будут сохранены только в версии документа для MS Word.
- Затем выбрать в меню Файл → Сохранить как. Откроется диалоговое окно сохранения документа.
- В выпадающем меню Тип файла, выбрать необходимый тип файлов MS Word.
- Щёлкнуть по кнопке Сохранить .
С этого момента все изменения, которые будут производиться в документе, отобразятся только в версии для MS Word. Это означает, что изменено имя документа. Если требуется последние изменения документа отобразить в версии для Apache OpenOffice, тогда нужно повторно вызвать диалог Сохранить как и выбрать тип файла Apache OpenOffice.
Сохранение файла в формате MS Word
| Чтобы указать Apache OpenOffice сохранять документы по умолчанию в формате MS Word, нужно выбрать в меню Сервис → Параметры → Загрузка/сохранение → Общие. В разделе Формат файла по умолчанию и настройки ODF, в поле Тип документа, выбрать Текстовый документ, а затем в поле Всегда сохранять как выбрать необходимый формат для сохранения файлов. |
Получение помощи
В Apache OpenOffice Writer предусмотрено несколько способов получения помощи. Кроме полной Справки (которую можно открыть клавишей F1 или выбрав в меню Справка → Справка по Apache OpenOffice), можно включить всплывающие подсказки, подробные всплывающие подсказки и специального Помощника через меню Сервис → Параметры → Apache OpenOffice → Общие.
Если подвести указатель мыши к любому значку, то появится небольшое окошко, которое называется всплывающая подсказка. В ней даётся краткое пояснение функции этого значка. Для получения более подробных объяснений, нужно выбрать в меню Справка → Что это такое? и задержать указатель мыши над интересующим значком.
Переводчик:Ю. Н. Иващенко2010
- Для сохранения файла под другим именем следует выбрать меню Файл → Сохранить как и в диалоговом окне Сохранить как ввести новое имя файла. Прим. ред. пер.
- Начиная с версии OpenOffice.org 3.2 сохранение с паролем доступно и для файлов в формате Microsoft Office. Прим. ред. пер..
- Если используются системные диалоги, а не родные диалоги Apache OpenOffice, то название опции может отличаться в разных окружениях. В этом случае надо ориентироваться на слова ‘пароль’ или ‘password’ Прим. пер.
- Рекомендуемый интервал 7 минут. Прим. ред. пер.
| Content on this page is licensed under the Creative Common Attribution 3.0 license (CC-BY). |
Enhancements to statistical functions
-
NORMDIST’s 4th parameter is now optional.
- 0 or FALSE calculates the probability density function. Any other
value or TRUE or omitted calculates the cumulative distribution
function. - If omitted, 1 is written to files for backwards
compatibility.
- 0 or FALSE calculates the probability density function. Any other
-
LOGNORMDIST’s 2nd and 3rd parameters are now optional, an optional
4th parameter has been added.- The 2nd, mean, parameter has the default value 0 if omitted.
- If omitted, 0 is written to files for backwards
compatibility. - The 3rd, standard deviation, parameter has the default value 1 if
omitted. If omitted, 1 is written to files for backwards
compatibility. - The 4th, cumulative, parameter is defined as — 0 or FALSE
calculates the probability density function. Any other value or TRUE
or omitted calculates the cumulative distribution function. — If a
value was given, earlier releases reading the file cannot interpret
the function and return an error.
OASIS ODFF/OpenFormula specification
Возможности OpenOffice
- Управление документами, созданными в ОС Windows, Mac, Linux;
- Встроенная возможность создания презентаций, текстов, таблиц, формул;
- Редактирование графики на высоком уровне;
- Контроль баз данных;
- Проверка правописания на русском языке;
- Последняя версия оптимизирована с Windows 7, а также Mac OS;
- Пакет OpenOffice обладает возможностью экспорта документов в формате PDF;
- Среди функционала, имеется табличный и текстовый процессор.
Преимущества
- Пользовательский интерфейс интуитивно понятен;
- Приложения обладают открытым исходным кодом;
- Поддерживается формат PDF без создания и редактирования;
- Встроенные дополнения, полностью компенсируют пакет MS Office;
- Можно загрузить полноценную русскую версию OpenOffice (языковой пакет в свободном доступе на официальном сайте);
- Присутствует math редактор;
- В наличии мощный текстовый и визуальный редактор HTML;
- Текстовый редактор для работы с документами форматов Word, Excel;
- Невысокие системные требования Apache OpenOffice;
- Возможность легко и быстро настроить панели инструментов под собственные предпочтения;
- Выпускается портативная версия продукта (работает без установки), занимающая минимум места на жестком диске;
- Частый выход обновлений и исправлений ошибок;
- Возможность расширения функциональности за счет макросов, интеграции дополнений;
- Состав пакета включает текстовый редактор, модуль составления таблиц, презентаций, БД, презентаций.
Недостатки
Окна, панели, меню и настройки
Долго появляется контекстное меню по клику правой кнопки мыши (30 сек. и более)
Возможные причины:
- В системе установлено слишком много шрифтов.
- В OpenOffice.org установлено слишком много расширений. В этом случае рекомендуется вызвать менеджер расширений Сервис — Управление расширениями и обязательно нажать кнопку Закрыть. Это приведёт к обновлению файлов конфигурации программы, и после этого меню должно работать быстрее.
2.3
Используйте возможности Вашей операционной системы.
2.3
Используйте Формат — Символы — Положение
2.3
В предварительном просмотре страницы две кнопки для печати. В чём разница?
| Принять участие в проекте! |
|---|
| Общие вопросы |
| Форматирование ответов |
| Вопросы использования |
| Популярные разделы: |
| Writer: Часто задаваемые вопросы |
| Calc: Часто задаваемые вопросы |
| Орфография и грамматика |
| Полезности и секреты |
| Главная страница |
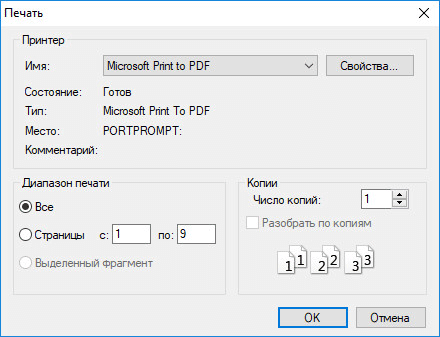
Вторая кнопка — предназначена для печати эскиза документа, рядом находится кнопка «параметры печати», с её помощью можно задавать печать нескольких страниц в одной и другие опции
2.3
В настоящее время нет.
Но пользователи KDE(Linux) имеют возможность просматривать такой документ в миниатюре при наведении мыши. Текста при таком способе просмотра не разглядишь, но представление о документе получить можно.
2.3.1
Щёлкните по кнопке дважды, кнопка зафиксируется в нажатом состоянии. Применяйте форматирование столько раз, сколько Вам необходимо. По окончании щёлкните ещё раз — кнопка примет начальное положение.
2.3.1
Названия закладок на русском языке в Навигаторе отображаются некорректно.
Проблема существует в том случае, если файл в формате doc. В настоящее время она пока не решена. Issue 85820
В файле ODT проблема отображения корректных названий закладок в не наблюдается.
2.3.1
Это обозначение режима выделения.
- СТАНД — Стандартный режим выделения. Любое новое выделение аннулирует результат старого.
- РАСШ — Расширенный режим. Если область текста уже выделена, новое выделение изменяет старое от его начала до позиции нового щелчка мышкой.
- ДОБАВ — Режим добавления. Если область текста уже выделена, новое выделение не отменяет старое.
2.3.1
Невозможно закрепить панели инструментов, чтобы не исчезали (в меню эти пункты не активны)!
Это особенность интерфейса OpenOffice.org. Такая панель инструментов называется контекстной, то есть отображается на экране только в соответствии с позицией курсора. Это позволяет экономить место на экране, не занимая его ненужными в данный момент значками.
Например, если курсор находится в таблице, то отображается контекстная панель Таблица.
Обычно такие панели отображаются в виде плавающего окна, также можно закрепить такую панель, нажав на значок «треугольник» и выбрав команду Блокировать панель. При переходе курсора в другой контекст закреплённая панель исчезнет.
2.3.1
Данная функция доступна в OpenOffice.org начиная с версии 3.0.
3.0
Начиная с версии 2.3 положение страницы отцентрировано
2.3
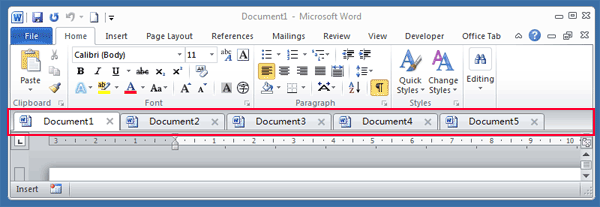
В ООо возможно получить доступ одновременно к неограниченному, в отличии от MS Word, количеству мест документа.
Для этого надо выполнить команду Окно — Новое окно, появится новое окно с этим же документом. Изменения, сделанные в одном окне отобразится и во втором. Количество таких окон не ограничено.
Этот способ особенно хорош для широкоформатных мониторов, когда окна можно расположить слева направо, что значительно удобней. Для обычных мониторов можно расположить окна одно окно над другим и получить, тем самым, полный аналог Word’овского разделения окон документа.
3.0
Куда делись дополнительные поля пользователя из свойств документа?
При работе в Word’е в свойствах документа созданы и заполнены дополнительные поля. Однако, при открытии .DOC-файла в OpenOffice.org из этих полей, в свойствах документа, видны только четыре.
Просмотр и редактирование всех полей пользователя в свойствах документа доступен через меню Вставка — Поля — Дополнительно — Сведения о документе — Особый. Здесь отображаются все введённые пользователем свойства документа. Здесь же можно их отредактировать.
3.0
Создание документа на основе шаблона
Для создания новых документов в Apache OpenOffice Writer можно использовать шаблоны. Они служат в качестве основы для создания документов, которые имеют схожую компоновку. Например, все документы в руководстве по использованию Apache OpenOffice Writer основаны на одном и том же шаблоне. В результате, все документы по виду схожи между собой; в них использованы схожие верхние и нижние колонтитулы, одинаковые шрифты и т. д.
По умолчанию в Apache OpenOffice имеется только небольшое количество шаблонов. Пользователи могут самостоятельно добавлять новые шаблоны и использовать их для создания новых документов. Работа с шаблонами подробно описана в главе 10 (Работа с шаблонами). Также дополнительные шаблоны можно найти в интернете, в частности на сайте extensions.services.openoffice.org.
Для создания документа на основе шаблона служит меню Файл → Создать → Шаблоны и документы. Откроется окно выбора шаблонов, которые можно использовать для создания документов.
На иллюстрации показан пример использования шаблона под названием “Книга”, расположенного в папке Мои шаблоны. Если его выбрать и щёлкнуть по кнопке Открыть , то будет создан новый документ с заранее определённым форматированием.
Создание документа на основе шаблона
Открытие существующего документа
Когда ни один документ не открыт, то стартовый центр предоставляет возможность щелчком на значке Открыть документ перейти в диалоговое окно открытия существующих документов.
Любой существующий документ можно открыть и одним из следующих способов. Если в Apache OpenOffice уже открыт какой-либо документ, то новый документ откроется в новом окне.
- Выбрать меню Файл → Открыть.
- Щёлкнуть по кнопке Открыть на панели инструментов Стандартная.
- Нажать сочетание клавиш Ctrl + O на клавиатуре.
В результате появится диалоговое окно Открыть, в котором можно выбрать необходимый файл и щёлкнуть по кнопке Открыть .
В этом диалоговом окне представлены все типы файлов, которые Apache OpenOffice способен открыть и этот список можно сократить, если выбрать конкретный тип файлов. Например, если выбрать тип файлов Текстовые документы, то отобразятся только те документы, которые могут быть открыты в Apache OpenOffice Writer (прежде всего *.odt, *.doc, *.txt). Таким способом можно открывать как документы MS Word (*.doc), так и документы, созданные в Apache OpenOffice и других текстовых редакторах.
Существующие документы Apache OpenOffice Writer можно открывать тем же способом, который используется в операционной системе для открытия любых документов.
Если ассоциированы файлы форматов Microsoft Office с Apache OpenOffice, то можно просто сделать двойной щелчок на значках таких файлов.
Сохранение документа
Чтобы сохранить новый документ в Apache OpenOffice Writer, надо выполнить одно из следующих действий:
- Нажать сочетание клавиш Ctrl + S .
- Выбрать в меню Файл → Сохранить.
- Щёлкнуть по кнопке Сохранить на панели инструментов Стандартная.
При первом сохранении появится диалоговое окно Сохранить и нужно ввести имя файла и проверить (если необходимо) тип сохраняемого файла.
Чтобы сохранить открытый документ с тем же именем, выберите в меню Файл → Сохранить. В результате будет перезаписана предыдущая сохранённая копия файла.